How to Study Anatomy: Memorise Diagrams by Labelling Them From Memory
Anatomy is a map you have to carry in your head. Here's how to memorise structures, diagrams and scans by labelling them from memory instead of staring at them.
Published 5 min read

Anatomy is less like a subject you understand and more like a city you have to be able to walk around blindfolded. You need the names, the positions, the neighbours and the relationships — and you need them on demand, often looking at an unfamiliar image in an exam.
That's why the usual study habits fail so badly here. Rereading a textbook chapter on the brachial plexus, or staring at a labelled diagram until it "looks familiar", leaves you able to recognise the answer when you see it — and helpless when the labels are gone.
This guide covers a better approach: labelling diagrams from memory, then bringing back the parts you miss until they stick.
Why staring at diagrams doesn't work
When you look at a labelled diagram, every answer is in front of you. Your brain has no reason to store anything, because it never has to retrieve anything. The result is the illusion of knowing: the diagram feels familiar, so you assume you know it.
The research on retrieval practice is clear that the act of pulling information out of memory is what makes it last. In Roediger and Karpicke's 2006 study, students who tested themselves remembered substantially more a week later than students who spent the same time restudying. There's also the generation effect: information you produce yourself is remembered better than information you simply read.
For anatomy, the "test" is simple: hide the labels and name the parts.
The label-from-memory method
Step 1: Pick one diagram and set a boundary
Don't start with "the upper limb". Start with one diagram — the bones of the hand, the chambers and valves of the heart, a sagittal section of the brain. Ten to twenty structures is a good size for one session.
Step 2: Learn it once, actively
Go through the diagram and, for each structure, say out loud:
- its name
- where it is relative to its neighbours ("lateral to…", "deep to…")
- one thing it does or one thing that makes it distinctive
This takes a few minutes and gives you something to retrieve.
Step 3: Hide the labels and test yourself
Now cover the names. There are two ways to test, and you want both:
- Name it: point at a structure — what is it called?
- Find it: read a name — where on the image is it?
These are different skills. Exams ask both ("identify structure A" and "which of these images shows the pterion?"), so practise both.
Step 4: Fix the misses, not the whole diagram
Note which structures you got wrong or hesitated over. For those — and only those — go back to the source and look at why you confused them. Usually it's a pair of neighbours you keep swapping (the flexor digitorum superficialis and profundus; the vagus and the phrenic nerve). Learn the difference between them explicitly.
Step 5: Come back at growing gaps
Retest the diagram the next day, then after a few days, then after a couple of weeks. Each time, start with the structures you missed last time. This is spaced repetition applied to images, and it's what moves anatomy from "I knew it on Tuesday" to "I know it in the exam".
Tips that make anatomy stick
- Learn in relationships, not lists. "The median nerve passes through the carpal tunnel" is easier to remember — and more useful — than "median nerve" alone.
- Use multiple views. Once you know a structure in one diagram, find it in a different view, a photo of a cadaver specimen, or a CT or MRI slice. Exams love an unfamiliar angle.
- Mix diagrams once you know them. Testing the heart, lungs and mediastinum together is harder than one at a time — and closer to the exam.
- Explain the function out loud. Anatomy sticks better when it means something. If you can say why a structure is where it is, you'll remember where it is. (See the Feynman technique.)
- Keep a mistakes list. Your confusions are personal and predictable. A short list of "things I always swap" is worth more than another read of the chapter. (See learning from your mistakes.)
Doing it on paper vs in an app
On paper, you can cover labels with sticky notes, or white-out the names on a photocopy and write them back in. It works, but it's slow to set up, hard to shuffle, and nothing tells you when to come back.
Anki has image occlusion built in: it hides each label behind a mask and makes a card for it. It's powerful, but you usually draw each mask yourself.
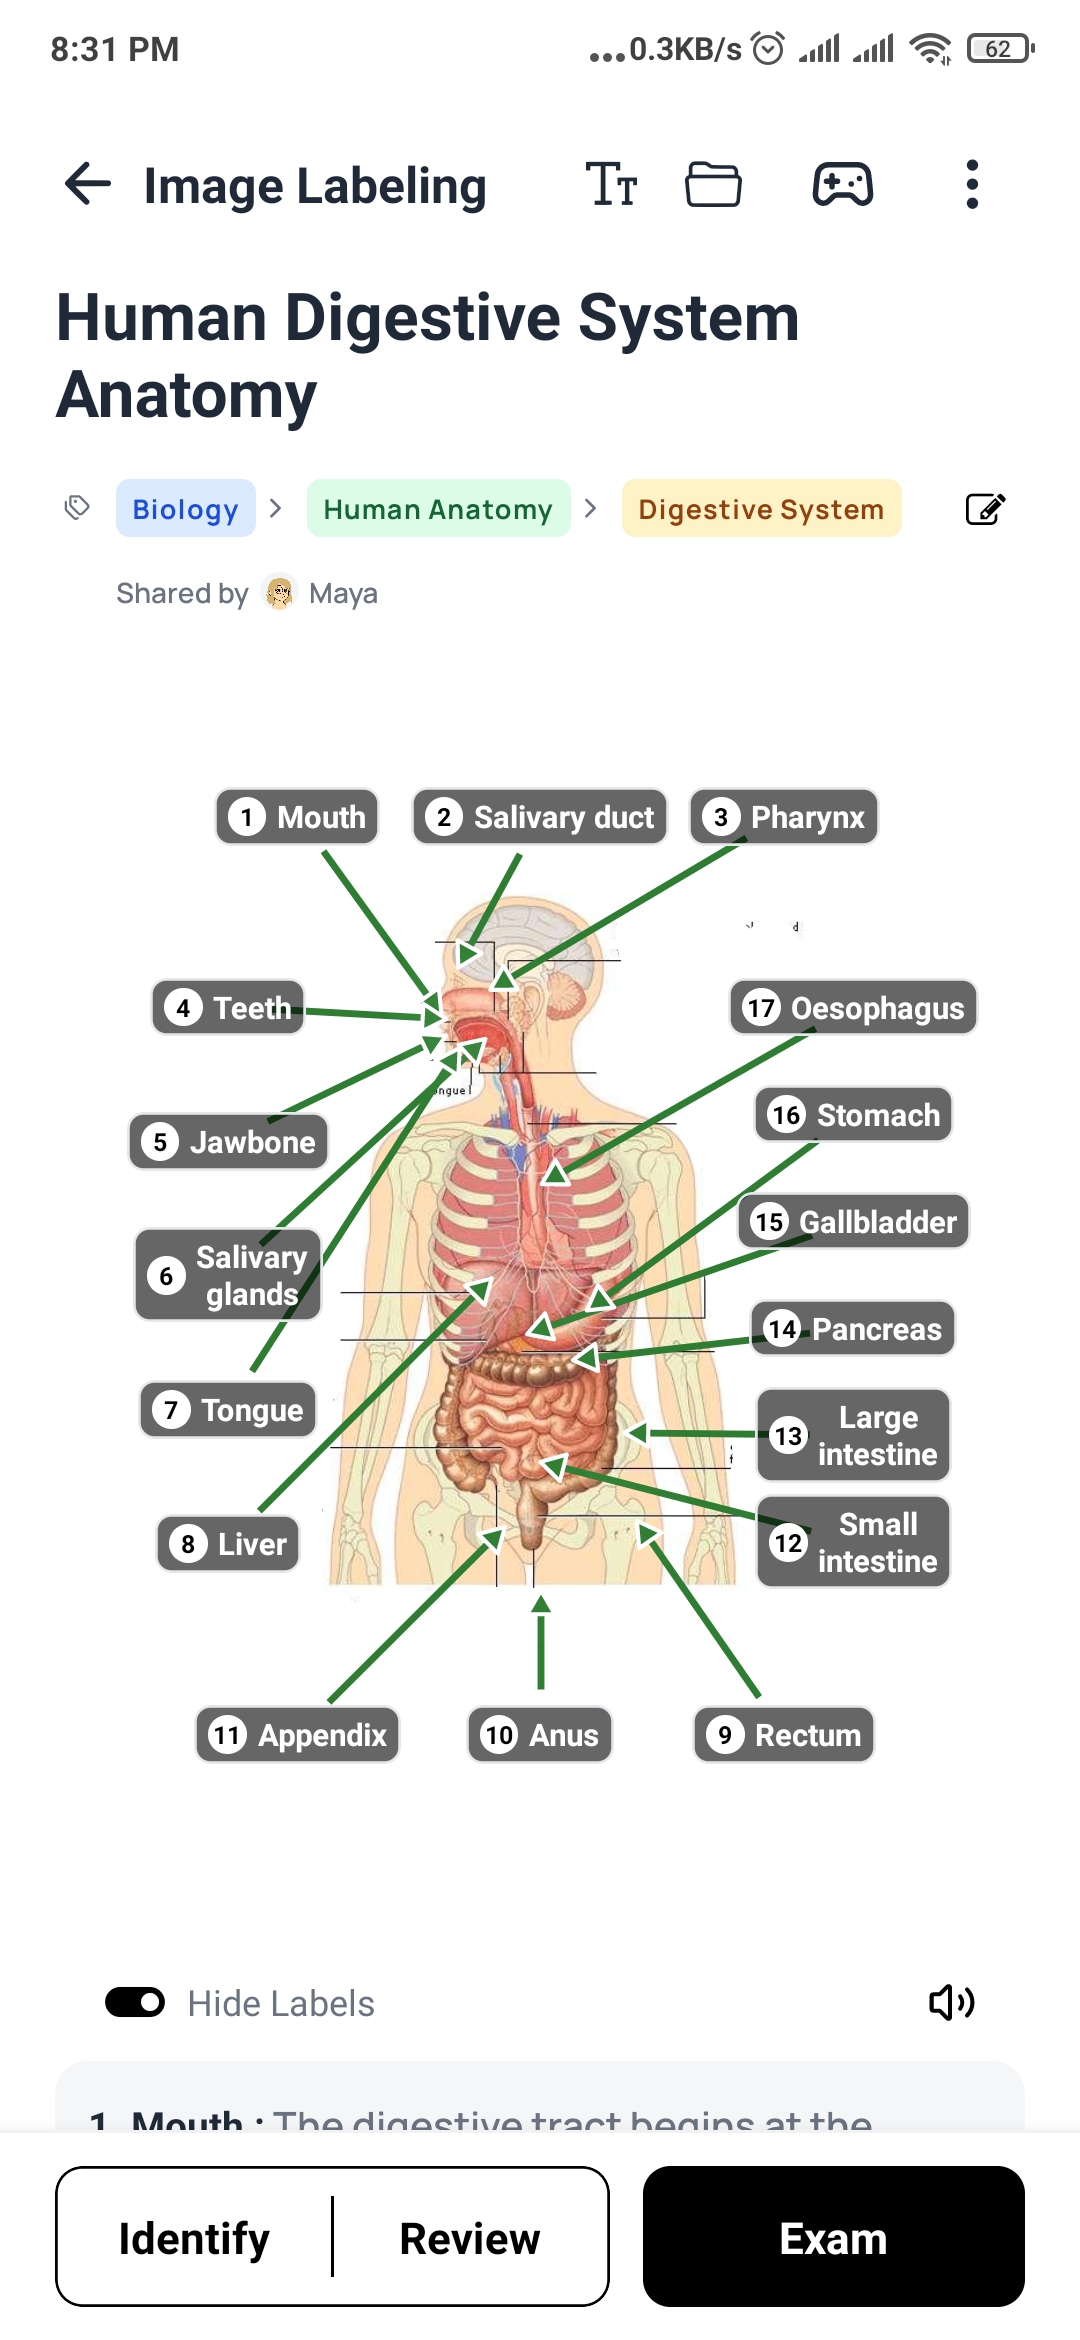
DeepRevision's image labelling is built for exactly this, and does the tedious part for you:
- Add any diagram — a textbook figure, a slide, a photo, a histology slide or an MRI.
- Pin the parts and press trace. Auto-trace outlines each part from the picture itself, so you don't draw boxes by hand.
- Hide the names and practise in three modes: Identify, Review and Exam. Answers are marked on the image itself, not picked from a list, so you're genuinely finding the structure.
- Every label is scheduled for review with FSRS, so the parts you miss come back sooner and the ones you know move further out.
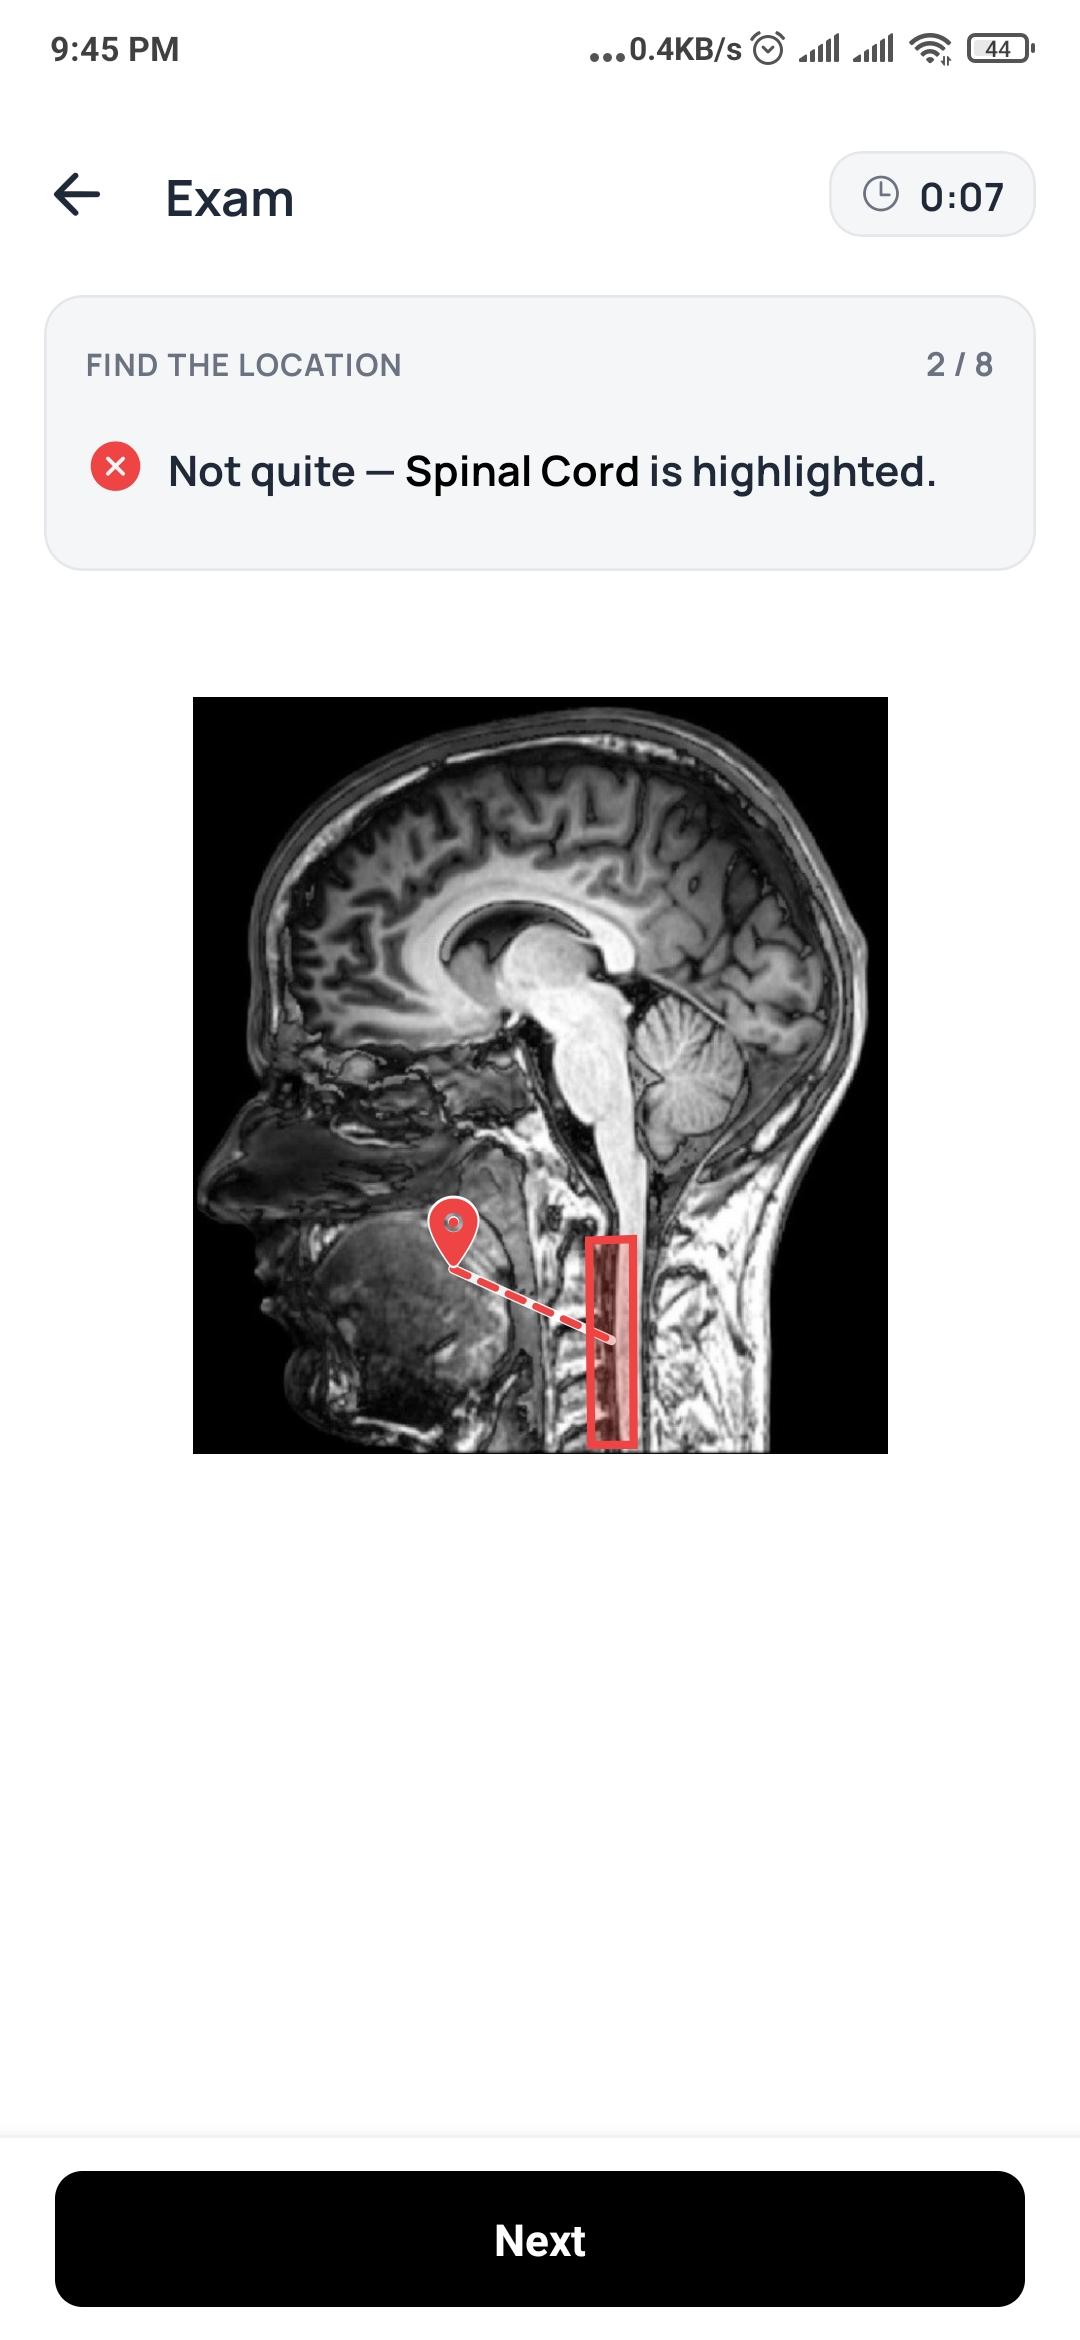
In exam mode you're given a name and have to tap where it is. Get it wrong and the correct region is highlighted on the image, so you see exactly how far off you were.
A weekly anatomy routine
| Day | What to do |
|---|---|
| Monday | Learn 2 new diagrams actively (name, position, function). Test each once before you finish. |
| Tuesday | Retest Monday's diagrams. Learn 1–2 new ones. |
| Wednesday | Clear your review queue first, then new material. |
| Thursday | Same again. Find one structure from this week in a different view (photo, scan). |
| Friday | Mixed test: all of this week's diagrams together, labels hidden. |
| Weekend | Review only. Go through your "things I always swap" list. |
Twenty focused minutes of labelling from memory beats two hours with the atlas open. Anatomy rewards the students who test themselves early and often — and who keep coming back to the structures they got wrong.
Frequently asked questions
What is the fastest way to memorise anatomy?
Label diagrams from memory. Cover the names on a diagram, try to name or locate every structure, check, and repeat the ones you missed on later days. It's far faster than redrawing or rereading because every attempt is a test.
What is image occlusion?
Image occlusion means hiding parts of an image — usually the labels on a diagram — and testing yourself on what's underneath. It turns any diagram into a set of questions without having to write them out as text.
Should I draw anatomy diagrams to learn them?
Drawing from memory is excellent practice, because it forces recall. Copying a diagram from the book is much weaker — it feels productive, but you're looking, not remembering.
How do I remember anatomy for the long term?
Combine labelling with spaced repetition: come back to each diagram after a day, then a few days, then a few weeks. Focus each session on the structures you got wrong last time rather than the whole diagram.
Sources
- Roediger, H. L., & Karpicke, J. D. (2006). Test-enhanced learning: Taking memory tests improves long-term retention. Psychological Science, 17(3), 249–255. doi:10.1111/j.1467-9280.2006.01693.x
- Slamecka, N. J., & Graf, P. (1978). The generation effect: Delineation of a phenomenon. Journal of Experimental Psychology: Human Learning and Memory, 4(6), 592–604. doi:10.1037/0278-7393.4.6.592
Stop studying everything. Study what you’re getting wrong.
DeepRevision turns your notes, slides and lectures into practice questions, finds the ones you keep missing and why, and brings each one back right before you’d forget it.
Written by
The people who build DeepRevision
We build DeepRevision, a study app that turns your own notes, slides and lectures into practice questions and brings back the ones you get wrong right before you'd forget them. We write about the research behind how students remember, and how to use it before an exam.


